OCuLink eGPU Home Lab
This article summarizes a hardware project: adding a desktop-class GPU to a Lenovo ThinkCentre mini PC using an M.2 → OCuLink adapter and an OCuLink eGPU enclosure. For step-by-step detail, see the linked notes below.
Why OCuLink instead of Thunderbolt?
Mini PCs are efficient and quiet, but integrated graphics hit a wall for gaming, CUDA, local inference, and transcoding. Thunderbolt eGPUs are convenient, yet they share a single high-speed link and often show a larger performance gap than a native PCIe run. OCuLink exposes PCIe lanes to an external box, so in practice you are much closer to “GPU on PCIe ×4” than to a typical TB enclosure—at the cost of opening the host, routing a cable out of the case, and giving up an M.2 slot (often Wi‑Fi or a secondary NVMe).
Hardware used in this build
| Role | Part |
|---|---|
| Host | Lenovo ThinkCentre mini PC (AMD Ryzen 5 PRO, ~30 GB RAM) |
| Link | M.2 (M-key) → OCuLink adapter |
| Enclosure | AOOSTAR (or similar) OCuLink eGPU box |
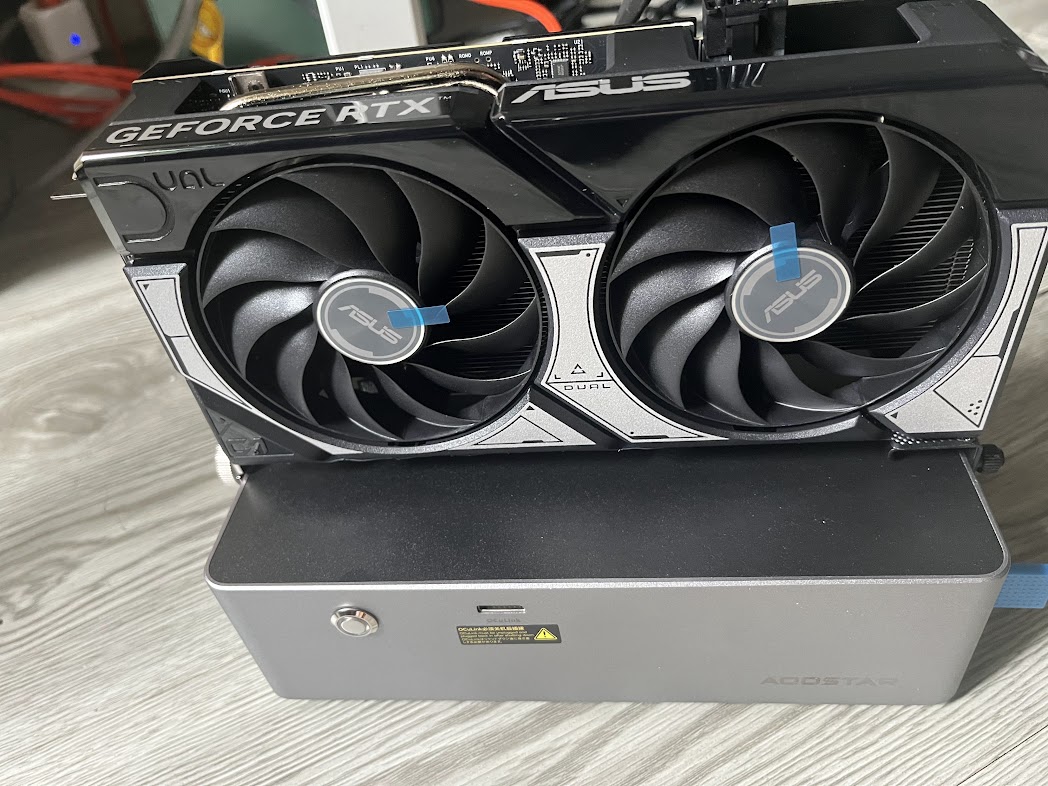
| GPU | ASUS GeForce RTX (desktop card) |
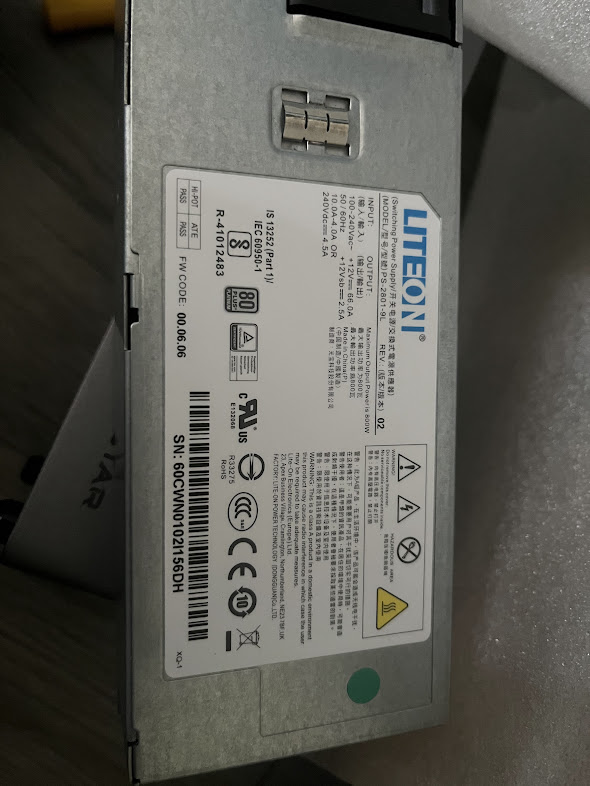
| PSU | Lite-On FS9323 / R-4K48S |
| Cable | OCuLink ↔ OCuLink (prefer a short, high-quality cable; avoid sharp bends) |
Build flow (high level)
- Prepare — Back up, unplug AC, ground yourself, photo screw layouts. Plan a backup network path (Ethernet or USB Wi‑Fi) if the adapter uses the Wi‑Fi M.2 slot.
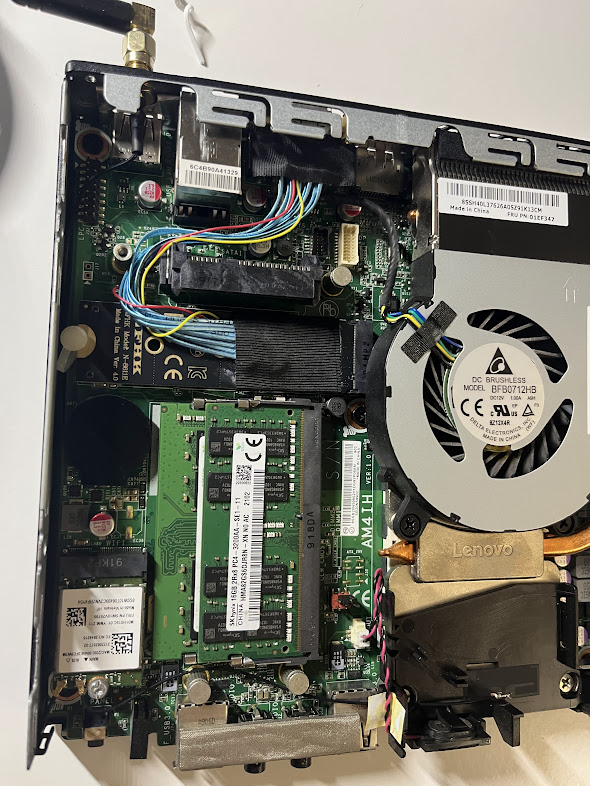
- Mini PC — Open the case, seat the M.2 OCuLink board, route the pigtail clear of the CPU fan and heatsink, exit the cable through a vent or planned gap, then close without pinching wires.
- Enclosure — Mount the PSU, install the GPU until the slot clicks, connect PCIe power (6+2 / 8-pin as required), keep airflow unobstructed.
- Power sequence — Enclosure on first, then the mini PC (helps reliable enumeration).
- BIOS — Look for Above 4G decoding, match PCIe generation to what your adapter supports, and be ready to toggle ReBAR while debugging.
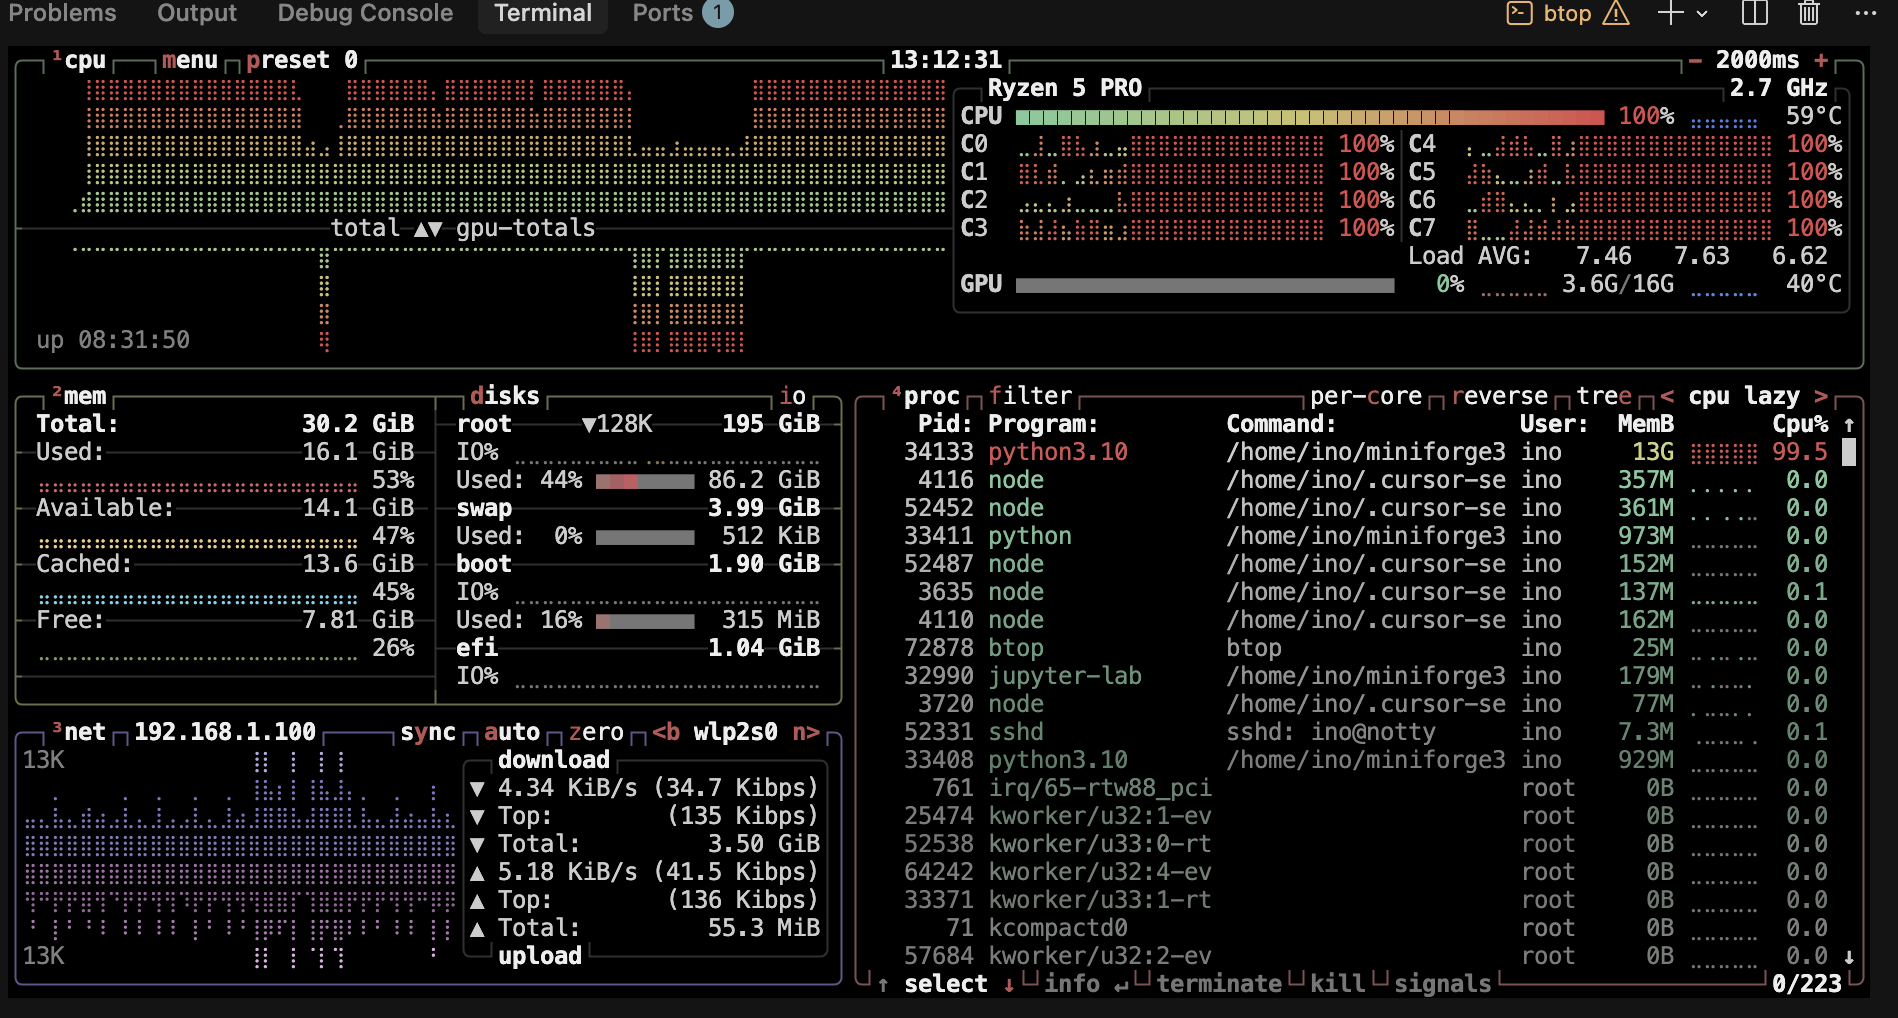
- OS — On Linux:
lspci, vendor tools such asnvidia-smi, and a monitor likebtopto confirm VRAM and thermals. On Windows: Device Manager + vendor driver package.
Details Worth Documenting
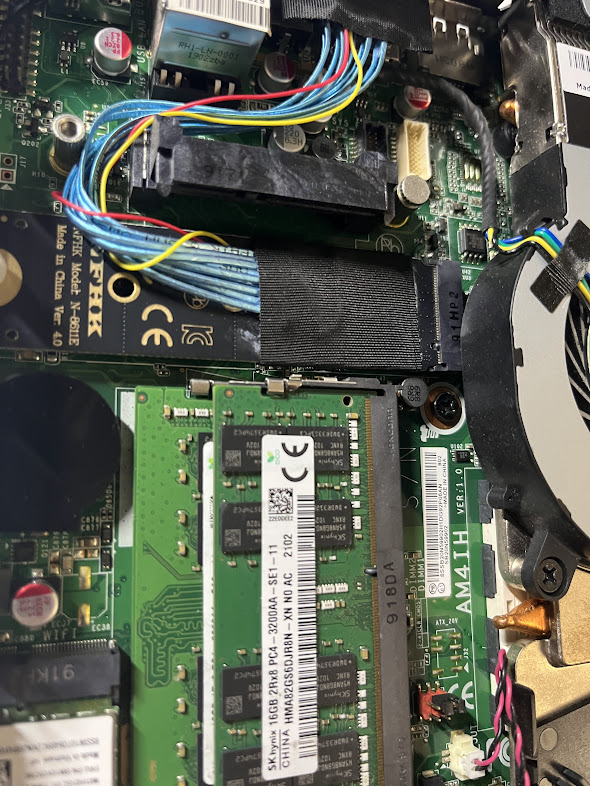
- The tightest part of the build is not the enclosure; it is the internal cable routing inside the Lenovo chassis. The OCuLink pigtail has to clear the blower fan, heatsink edge, and nearby RAM without getting pinched when the lid goes back on.
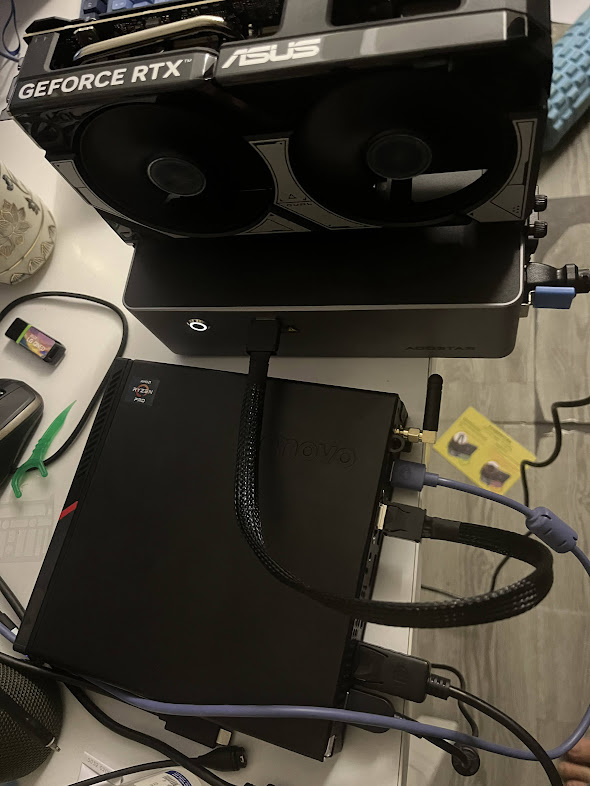
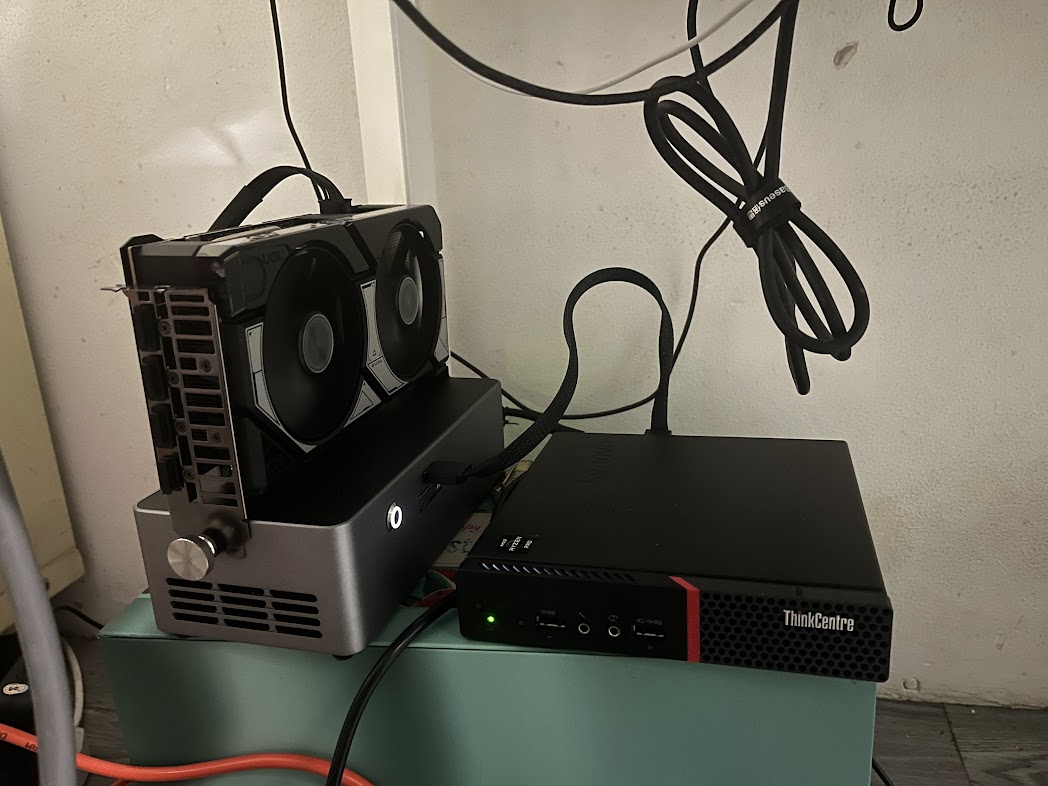
- The fully connected setup gets cable-heavy fast: host power, enclosure power, monitor output, and the OCuLink data cable all compete for desk space.
- The enclosure PSU label is visible in the build photos, which is useful when checking power headroom against your chosen GPU.
Gallery
Power Sequence in Motion
Short MP4 clips are embedded here instead of GIF so the page keeps better image quality at a much smaller file size, and readers can pause or scrub through the sequence.
Expectations and caveats
- Performance: Plan for roughly ~5–10% loss versus the same GPU in a desktop ×16 slot—often still better than many Thunderbolt setups for bandwidth-sensitive work.
- Footprint: You now have two powered units and a thick data cable on the desk.
- Risk: Internal mods can void warranty; bad PSU choice or pinched cables can damage hardware.
Do this at your own risk. Use a PSU rated for your GPU, keep vents clear, and monitor temperatures on both the mini PC and the enclosure under load.
Who this is for
Good fit: You already want the mini PC as the always-on brain, and you want one strong GPU for ML, builds, games, or transcode, and you are comfortable with tinkerer-grade integration.
Poor fit: You need a single travel bag solution, you cannot lose internal Wi‑Fi, or you must keep vendor support / warranty untouched.
Further reading
- Research Notes · Tutorials · Projects
- Long-form notes:
oculink_lenovo(setup guide, checklists, build story)
Quick Linux checks
lspci | grep -i -E 'nvidia|vga|3d'
nvidia-smi
Last updated: June 2026