Building a Soil Humidity Sensor for Pot Plants
This page reconstructs the archived b-io.info tutorial on soil humidity monitoring for potted plants. The original was split across four pages; this version keeps the main build logic in one place.
Project goal
The aim is to monitor pot soil moisture with a small ESP8266 node, send readings over Wi-Fi using MQTT, and optionally show a simple color indicator so you know when to water a plant without checking the soil manually.
Choosing the sensor type
The original guide compares two common approaches:
- resistive probes
- capacitive probes
Resistive probes are cheap but gradually corrode because current flows through exposed metal in wet soil. The archived guide argues against them for long-term plant use.
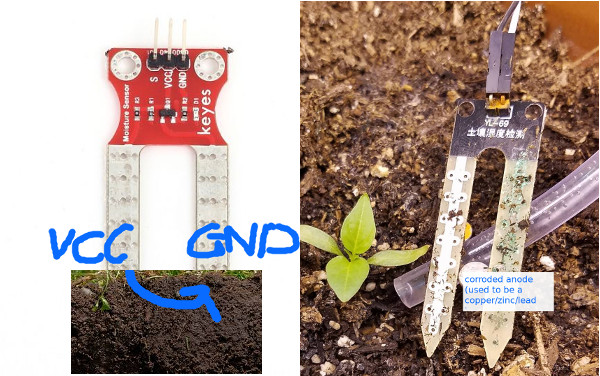 Resistive sensors are simple, but corrosion is the main drawback.
Capacitive probes avoid direct conduction through the soil and are better suited for longer-term monitoring. The archived build specifically uses the Chirp sensor, an I2C-capable capacitive soil sensor.
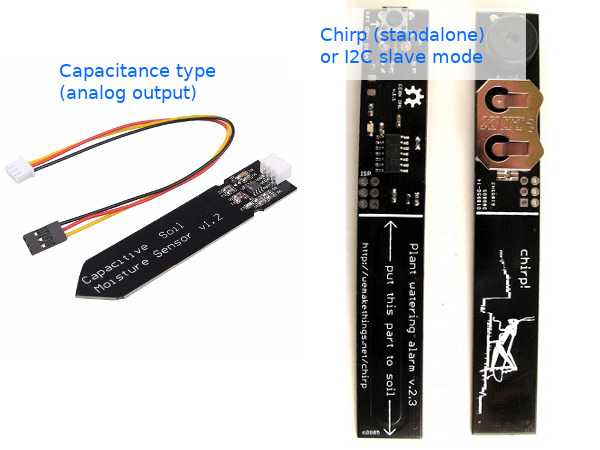 Capacitive sensing is better suited to long-lived pot monitoring.
Hardware used
Main components from the archived build:
- WeMos ESP8266
- Chirp soil moisture sensor
- DS18B20 waterproof temperature probe
- Li-ion battery
- 5V boost converter
- battery protection board
- small enclosure
The overall cost target was roughly USD 10-12 excluding spare tools and general supplies.
Wiring and assembly
The build is a battery-powered ESP8266 node with moisture sensor, temperature probe, and battery-voltage readback through a divider into A0.
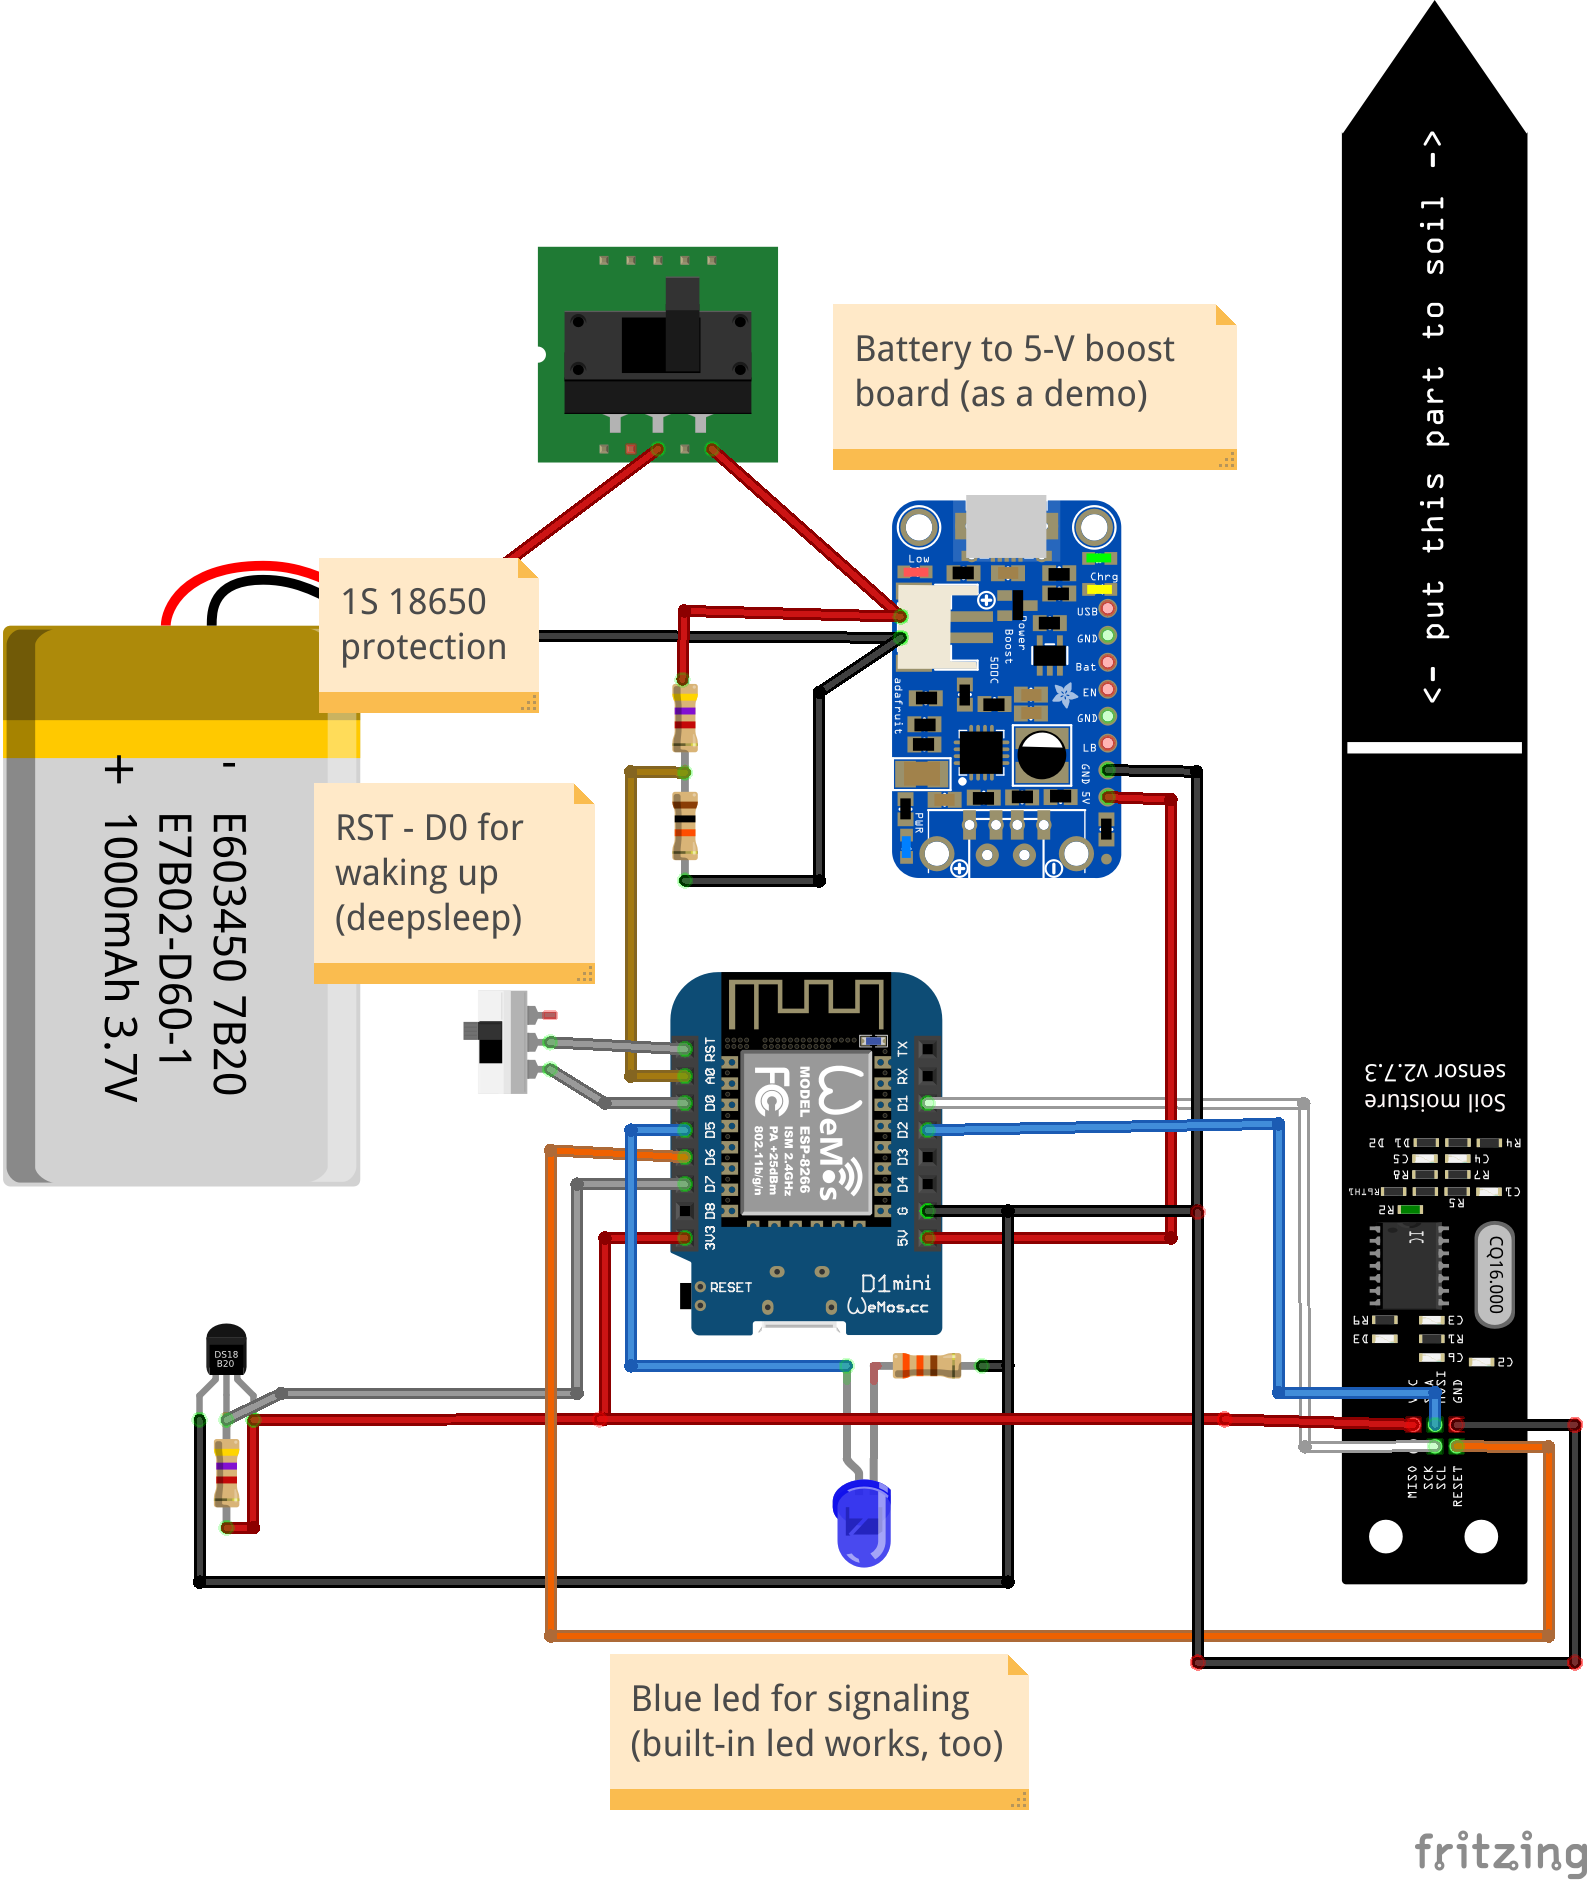 Archived wiring diagram for the ESP8266 + Chirp + battery build.
Practical build steps from the original tutorial:
- remove unnecessary connectors to save space
- wire battery, protection board, and boost converter first
- cut holes for USB charging, switches, and sensor leads
- seal cable exits with glue
- protect the top of the Chirp board from direct water exposure
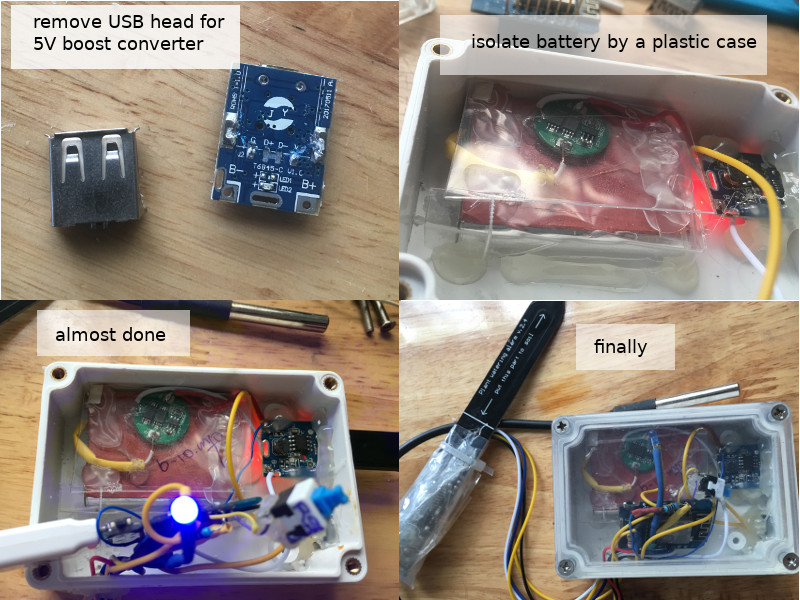 Physical assembly inside the enclosure.
Why deep sleep matters
The tutorial’s most useful engineering point is about power. Interval sampling while the ESP8266 stays awake drains batteries quickly. Deep sleep changes the whole viability of the project.
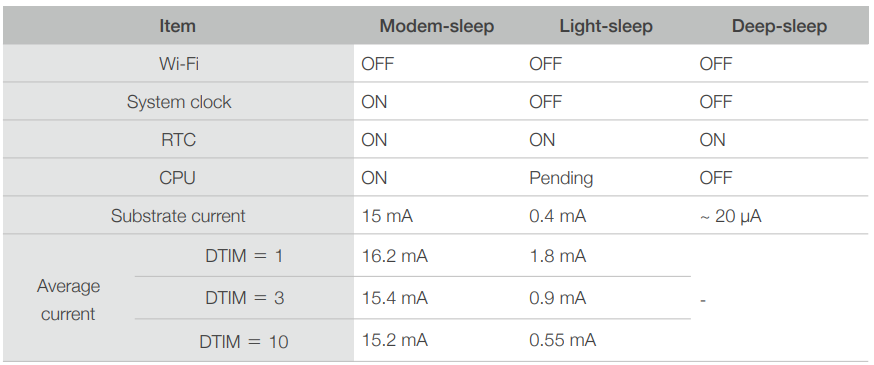 Wireless transmission dominates the power budget; deep sleep is the fix.
The archived guide compares two approaches:
Interval sampling
int interval = 60;
int lastSample = 0;

void loop() {
  int uptime = millis()/1000;
  if ((uptime - lastSample) >= interval) {
    // read humidity
    // push MQTT data
    lastSample = uptime;
  }
}
Deep sleep sampling
void setup() {
  // init
  // read humidity
  // push MQTT data
  ESP.deepSleep(12e8); // about 20 minutes
}

void loop() {
  // not used
}
This is the core design choice for a battery-powered outdoor or balcony node.
Code and data upload
Original repository:
The archived sketch:
- initializes Wi-Fi and MQTT on wake
- reads DS18B20 temperature
- reads Chirp moisture
- estimates battery voltage from
analogRead(A0) - publishes the packet
- returns to deep sleep
One implementation detail from the original tutorial is worth preserving: Chirp could be temperamental in I2C mode, and the author documented manual reset timing during bring-up.
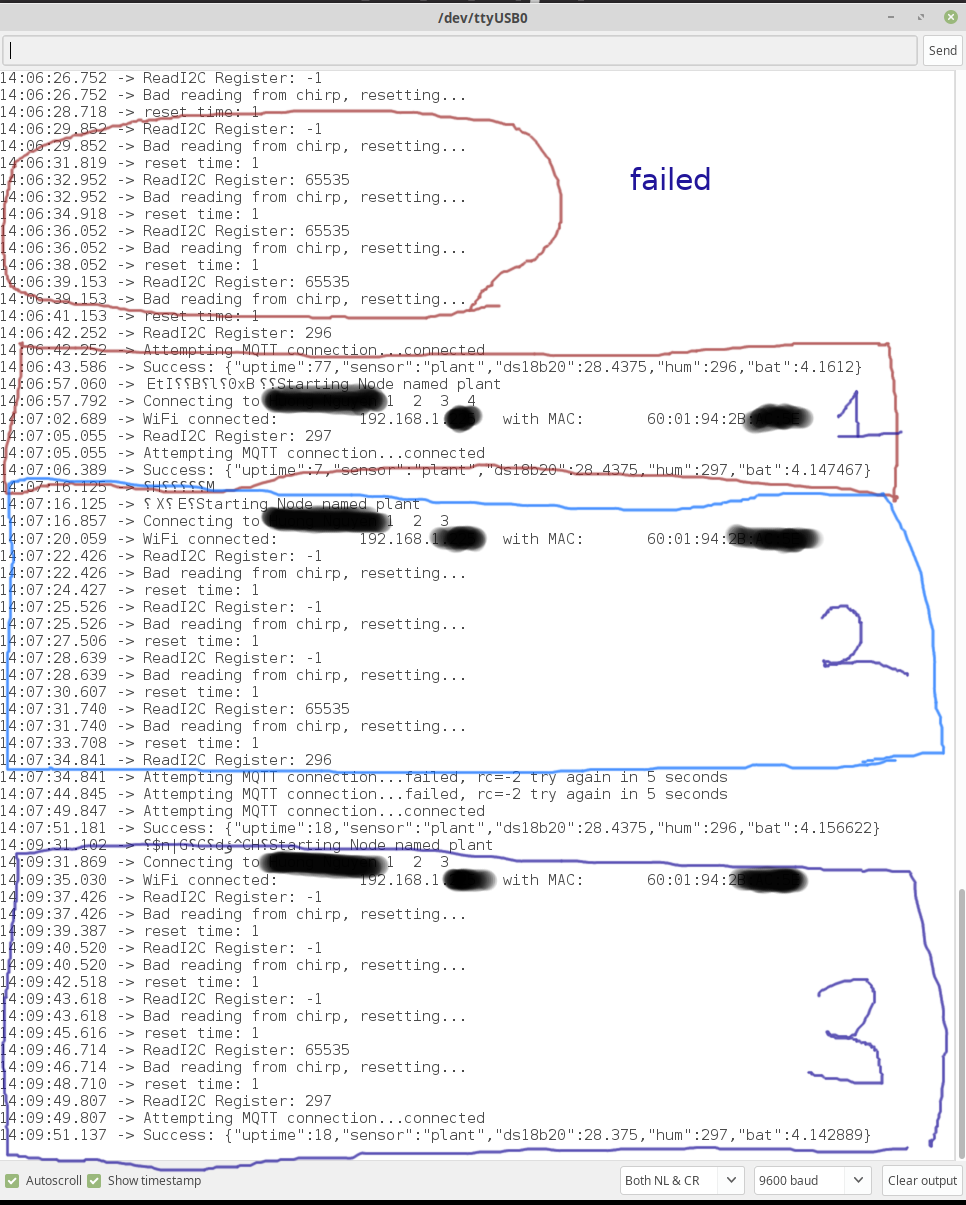 Debugging the Chirp sensor during setup and reset timing.
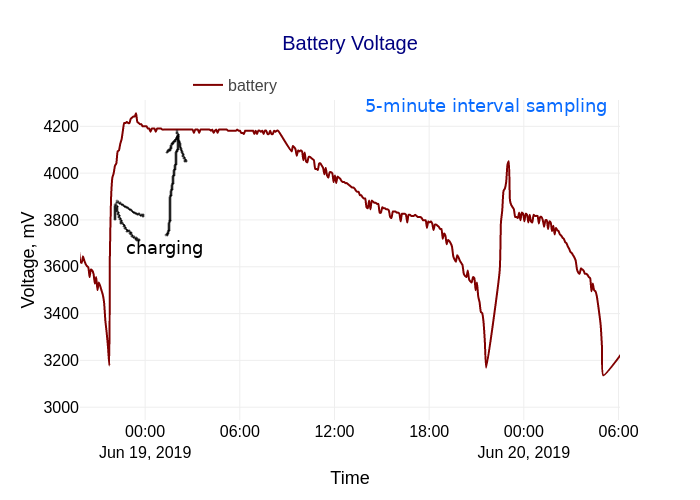
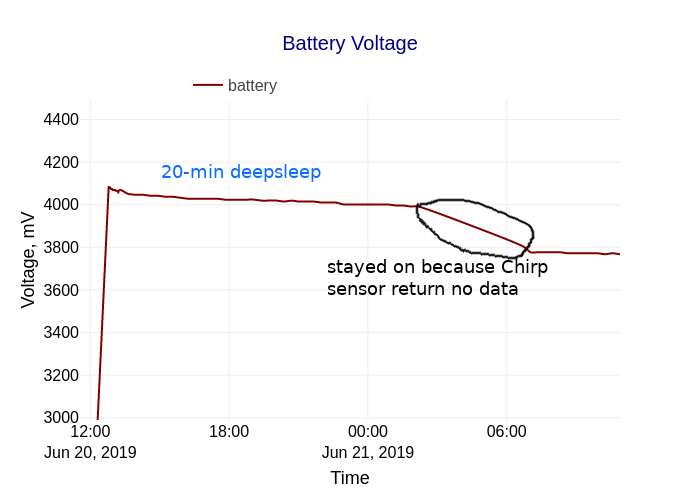
Example field results
The archived tutorial compares three operating modes:
- 5-minute interval sampling
- 20-minute deep sleep
- 20-minute deep sleep with a small solar panel assist
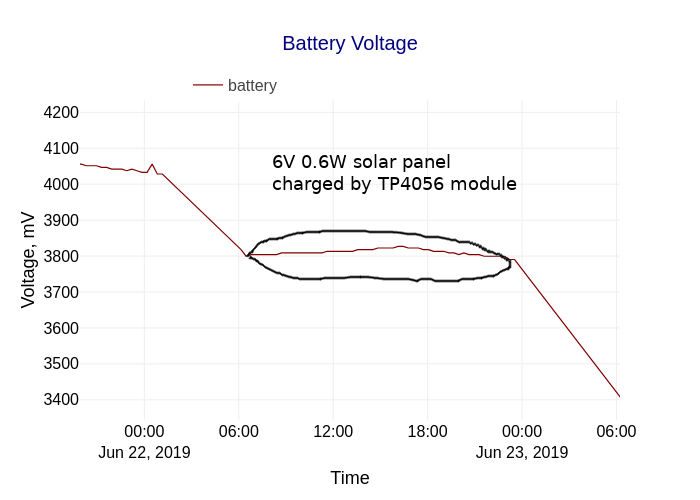
Moisture trends from the archived build:
 Lower values correspond to drier soil in this setup.
Physical deployment:
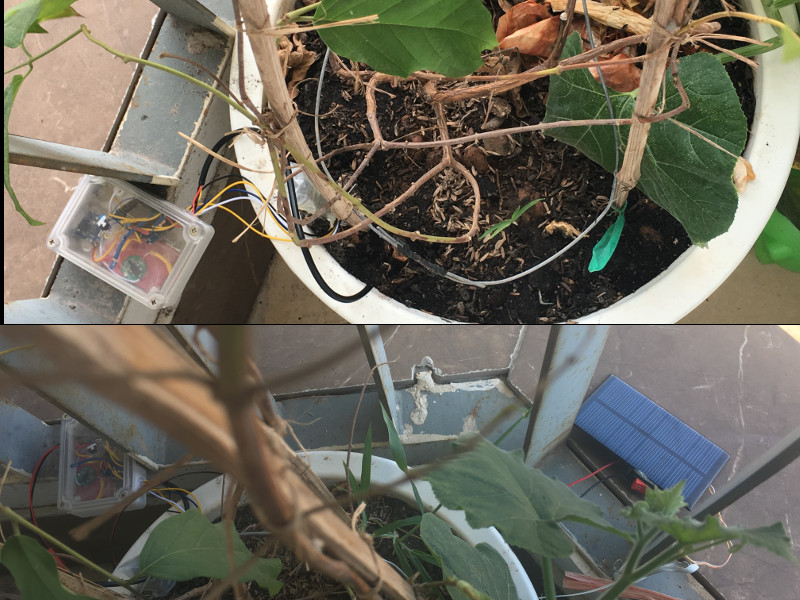 Installed sensor and probe placement in a potted plant.
Simple indicator node
The final page in the old tutorial adds a low-effort indicator using a WS2812 LED. Moisture is mapped to color so the plant can be checked visually.
void set_color(int hum_) {
  if ((hum_ < 280) || (hum_ > 550)) {
    r = g = 0;
    b = 255;
  } else {
    r = map(hum_, 280, 550, 255, 1);
    g = 255 - r;
    b = 0;
  }
}
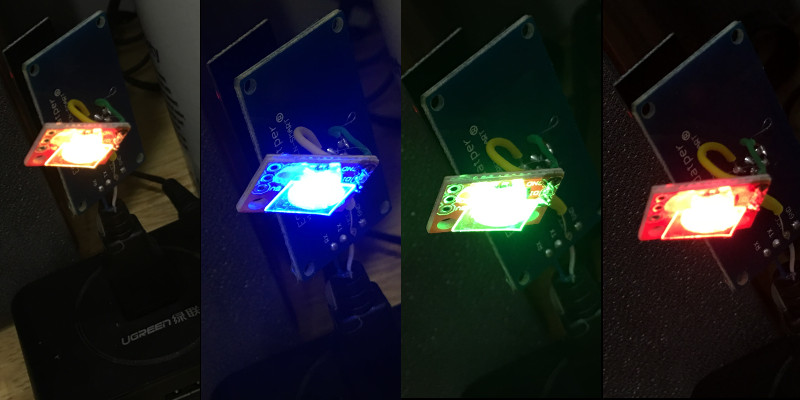 Simple moisture indicator using a WS2812 LED.
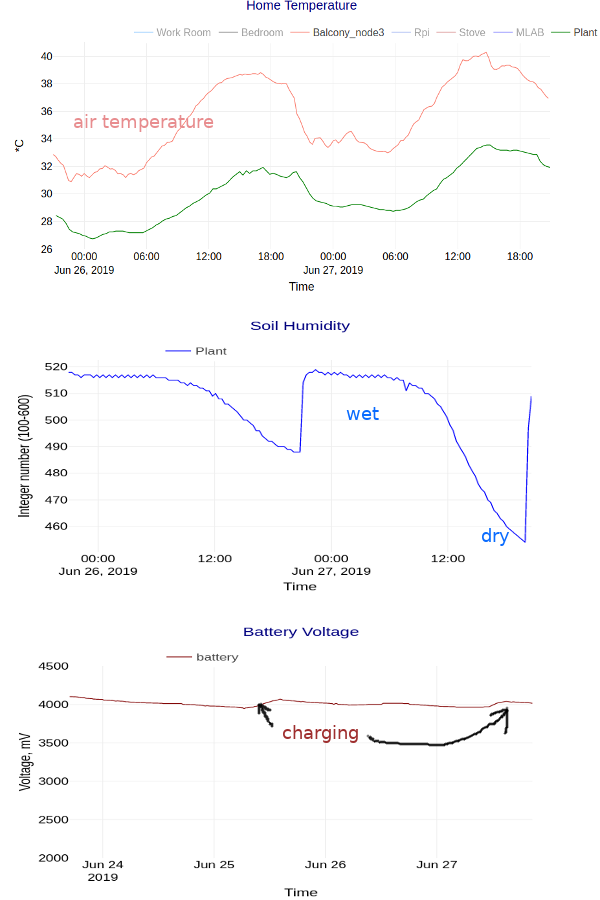 Archived multi-day operation of the plant monitor.
Practical takeaways
- use capacitive sensing rather than cheap resistive probes for longer-lived plant monitoring
- deep sleep is the difference between a novelty and a usable battery node
- MQTT makes it easy to add logging and dashboards later
- a simple local indicator is often enough, even without full pump automation
Related references
Original Reference
First published on Instructables: